A small greenhouse or a mini greenhouse as more popularly known is a blanket term that is vastly used to encompass any and all greenhouse designs that aren’t the usual commercial size and can be used for smaller commercial establishments or in backyard farming as well. This method of growing produced evolved because conventional greenhouses are relatively expensive and space-intensive, while the same benefits can be reaped by extending the logic of a greenhouse to a backyard, or even to a kitchen garden!
Given the temperature shield a greenhouse or anything akin to the same provides, it makes growing a variety of plants all year round, irrespective of the fluctuation in temperatures of changing weather. The two main benefits of making your own small greenhouse are the fact that you can use really makeshift material to construct one, often out of the waste that you generate through your routine consumption and activities. The second advantage, aside from quick and cost-devoid construction, is the fact that you can make a greenhouse suitable for any amount of space! Be it on a kitchen counter, a windowpane, or a walk-in greenhouse in your backyard.
Talking about commercial mini-greenhouses, those are generally made out of metal or plastic pipes or a combination of those two, having anywhere between 1 and 3 shelves stacked atop one another. The said frame of pipes or metal is covered with plastic with a door-like outlet which can be zipped and unzipped to allow access in and out of the greenhouse. These DIY mini-greenhouses can come in super-simplified designs, i.e., as simple as a greenhouse flat with a structure made of ductile wire, or any other makeshift items that you would not otherwise associate with the structural design of a greenhouse.
Picking Up a Small Greenhouse Project
A small or mini greenhouse is incredibly simple to make; you need some plastic containers (for a counter-sized greenhouse) and poke holes all over it. These containers could range anywhere from take-out disposable boxes or even water bottle heads! The size of your container would depend upon what you want to grow, what kind of space it requires to expand, both beneath the surface and above.
Before beginning the planting process, it is imperative to wash the container extremely well in order to make sure that the container doesn’t have any traces of its original content left. Once the container has been cleaned and poked, it is ready to be used as your mobile greenhouse. Small potted plants can now be placed in these containers and kept by the window or at your kitchen counter or balcony, wherever there’s sunlight for them to grow into healthy sprouts or plants.
Once you find the leaves taking on their full size and shape, you can take the same for a signal to dig out whatever you’re growing and consume it. You can wash off this make-shift greenhouse and then use it again to grow something else.
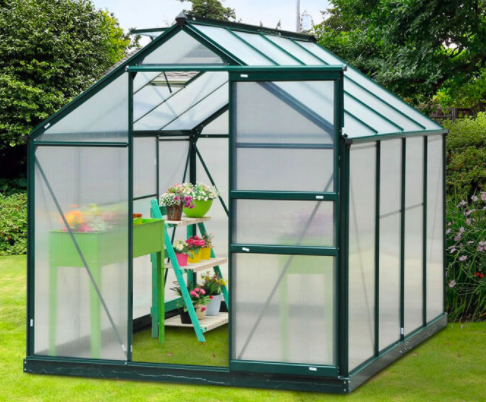
For a backyard-sized greenhouse design, you might want to get plastic sheets (feel free to use if you have any from consumer electrical goods that you might have purchased and the same came with plastic wrap as one of their protective layers). You could purchase plastic from stationery shops or get the same from packers-movers. Once you’re done acquiring these, you need to look into what you can make a frame out of. This can be as simple as bamboo or wooden frame or can be a full-fledged metal and wood construction making it a hut-shaped greenhouse with plastic, fiber, or glass exterior.
We shall look at different mini-greenhouse designs moving ahead, and we hope that it’ll give you a better perspective as to what kind of DIY greenhouse project would suit you for your needs and for your level of skill.
Types of Small Greenhouses
Broadly speaking, there are three primary types of small greenhouses that are popular on a commercial scale. These are:
- Lean-to
- Detached
- Ridge & Furrow/ Gutter
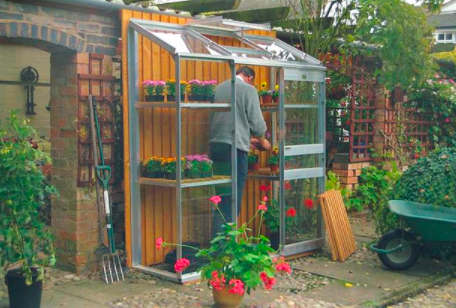
Lean-to
Not a lot of Lean-to greenhouses are seen in the commercial setting due to its one glaring deficiency – limitations in size; but this type of greenhouse is extremely famous when it comes to hobbyists. A Lean-to greenhouse is essentially constructed as an out-growth to a wall, usually a wall of the house the person lives in, hence the name “Lean-to”; the greenhouse effectively leans to the wall.
This greenhouse design uses the same materials as any other greenhouse which is commercially used. When you’re trying to seek out the best fit for your usage, you might want to consider either a polycarbonate lean-to greenhouse or perhaps a glass lean-to greenhouse. There are clear benefits and drawbacks of both the material choices but at the very basic, these two options that come in extremely affordable, offer the benefits of greenhouse insulation just fine. You can use any other material combinations that are used in any greenhouse, whatsoever, for the lean-to design.
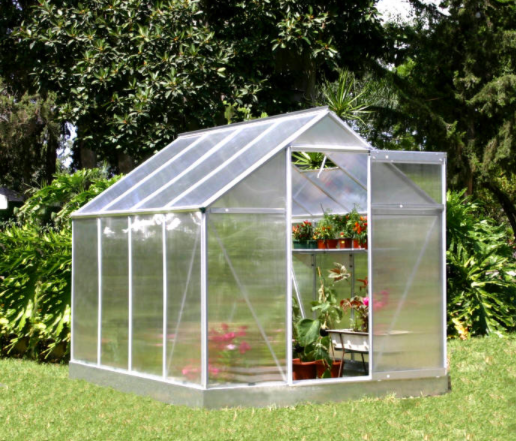
Detached
Detached greenhouses on the other end, stand independently from any structure, as from one another. However, they are often seen to be connected to a work area or provide connected access to other greenhouses on the same patch of land, usually through a corridor. One of the most popular designs within the detached concept of greenhouses as seen in a production done at a commercial scale is the Quonset.
These greenhouses are made up of arched rafters and are commonly seen to have solid end walls which provide robust support. This specific variety of greenhouse is suitable for the production of most crops, however comes with a limitation – the growing area is somewhat restricted near the side walls which may end up serving as a major hindrance.
Ridge & Furrow
Ridge and furrow greenhouses are designs that are connected at the eave with a common gutter. This particular variety of greenhouses may be either gabled or even have a curved arch. Gabled houses are opted for in case a heavy covering made of either glass or fiber is to be used for temperature capture. On the other hand, curved arch houses are made in order to be able to use lighter materials (i.e., polyethylene, polycarbonates) in order to cover the structure. A “range” is a collection of many such gutter greenhouses built on a single patch of land.
Tips for Starting Your First Greenhouse
Given you want to be able to grow all year round, it’s safe to say that setting up your own greenhouse is a long-term investment and must be done with adequate planning in place.
Here are a few tips that might come in handy before you decide to venture into the greenhouse construction/ set-up:
- Location and Direction
You need a MINIMUM of 6 hours of direct sunlight for your greenhouse to be able to operate as one. While in tropical and temperate countries, just sunlight may work out fine for keeping the plants toasty even at night, in colder regions, additional temperature control may be required by installing heating systems for night time. Further, south-facing greenhouses give the maximum sunlight exposure, making your greenhouse as effective as it potentially can be.
- Material for Glazing (Covering the Frame)
If you live in a super windy or rain-prone area, consider setting up a robustly built greenhouse that is immune to high pressures or torrential rainfalls. In relatively dryer and timid regions, one can opt for plastic sheet-based material for constructing their greenhouse, but it is better to have a sturdier structure made of glass or fiber if you wish to fight adverse weather conditions.
- Site Selection
In case you don’t have a self-sufficient greenhouse, which is mostly the case, you need it to be close to the electricity source and water source. Therefore, it must be placed somewhere you can get easy access to water and carve out a usable path of drainage as well. Similarly, if your greenhouse requires artificial temperature control, you must site it well enough to be able to extend a power source to be able to effectuate the same. However, if such temperature control requirement is relatively lower, you can use grow lights to compensate for the inadequate sunlight.
- Pest Control
To avoid an infestation situation, EVERYTHING must be clean from the moment your greenhouse is just beginning to take shape. Besides the actual structure, the quality of soil and seed must be impeccable and the garden tools that are utilized towards growing must also be kept in a clean manner, devoid of any remains from previous usage or any foreign particle.
- Framing Material
Again, much like Glazing, the choice of material which you use towards erecting the frame of the greenhouse would largely depend upon your climate and the dominating weather conditions therein. In extremely watery regions which experience a lot of rainfall, it may not be wise to use metal frames as they’d require constant upkeep. Bamboo-based frames or even plastic frames might work well for such areas.
Concluding this discussion, the productivity and easy operability of a greenhouse hugely depend upon the design elements. Additionally, the set-up and maintenance costs of the facility are influenced by the materials used. Therefore, these decisions become extremely critical when one decides to set up a greenhouse.
In commercial experience, ridge and furrow greenhouses have highly efficient output in crop production. Aluminum is hailed to be the most durable framing material for commercial greenhouses and polyethylene film earns the reputation of the most affordable covering material in largescale greenhouses. Hope this guide assists you in setting up your own greenhouse!